OMG! I can’t believe it’s been over a year since we threw this birthday party for my son. I hate to have missed all this time sharing it with you but it sure was fun! Since it is World Emoji Day, it seems fitting to share it with you. And there is even an emoji movie hitting theaters soon…so you can get a jump on planning your emoji party now! I am sharing my party sources and tips after the pics.

As my son continues to get older, the elaborate over the top birthday parties that last for hours on end and involve months of planning are slowly fading. But this just presents a new challenge….how to make his special day unique down to the details without it taking over the house and the budget (wink!).
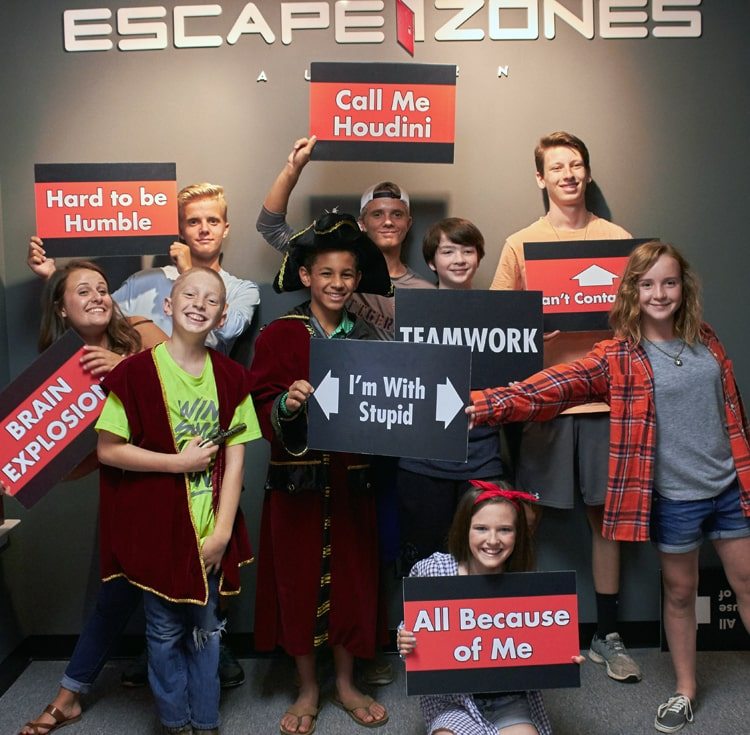
For years, we skipped out on any party idea that we couldn’t host at home, with one exception when we did his laser tag party. For this party, we decided to venture out once again and went to Escape Zones! If you haven’t been to an escape room yet, don’t miss it. You and a group of friends are locked into a room full of clues. You have 60 minutes to work together and solve the riddles to escape before time runs out!
My son and his friends entered Black Beard’s Brig where he and his crew were captured by Black Beard’s pirates and thrown into his brig. The pirates have gone to another ship to pillage and plunder, but promised to return by sunset to have them all walk the plank. They have 60 minutes to escape the brig and save themselves from eminent doom. Can they escape or will they face a watery grave? Given the theme of this room, a pirate party would have been fun too!
I kept the party planning simple and created key elements to tie our theme together:
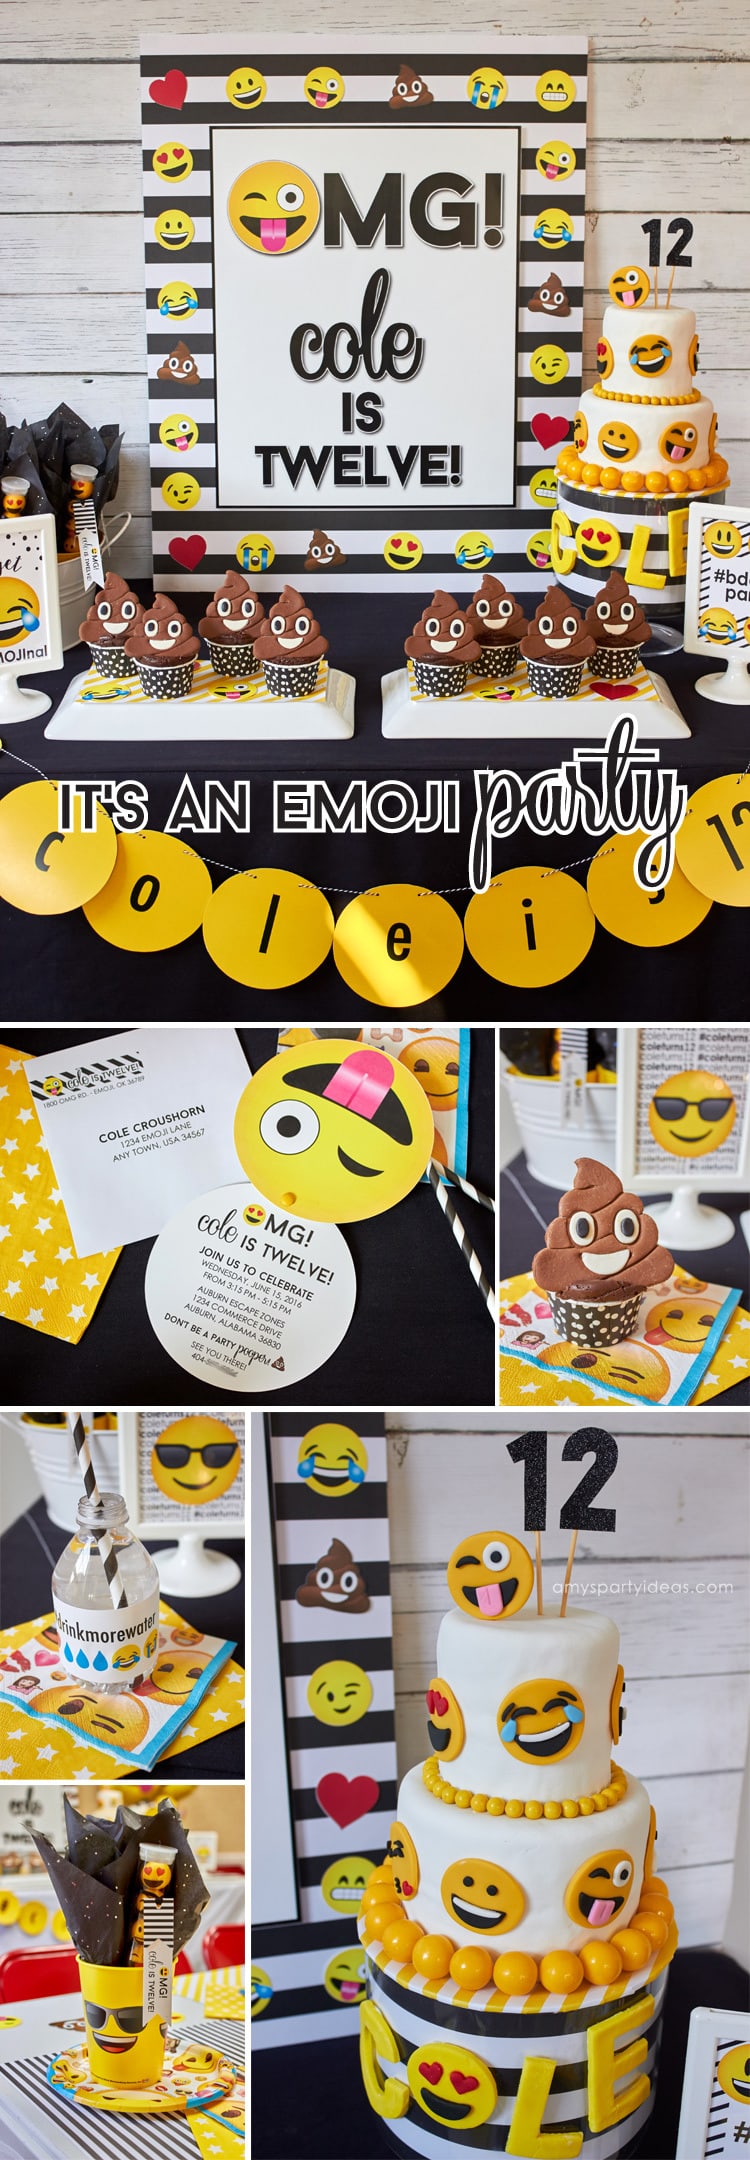
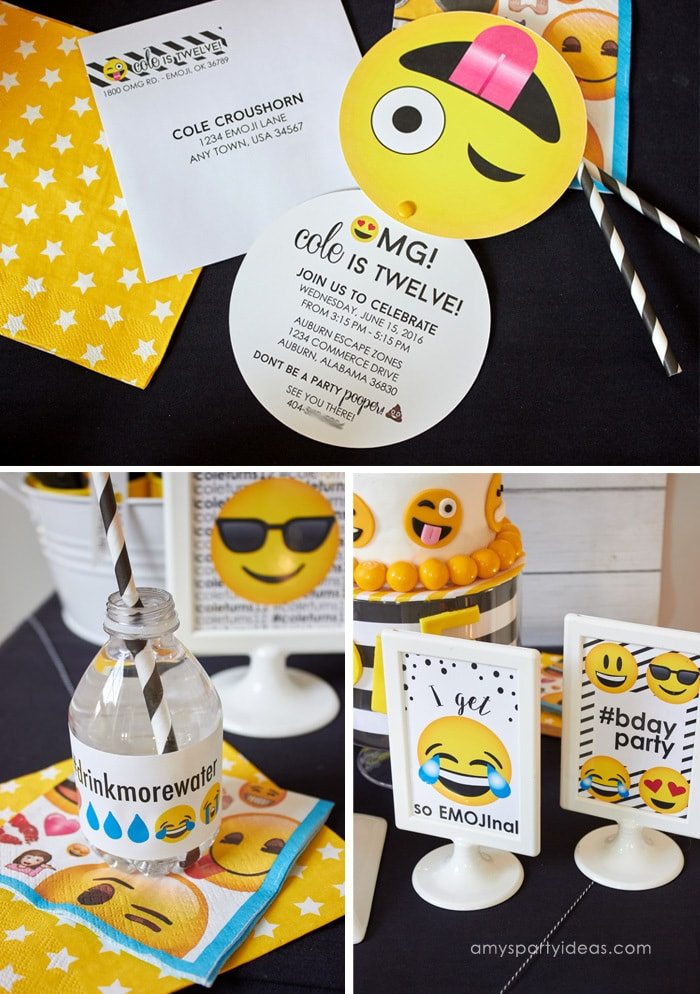
1. Invitations
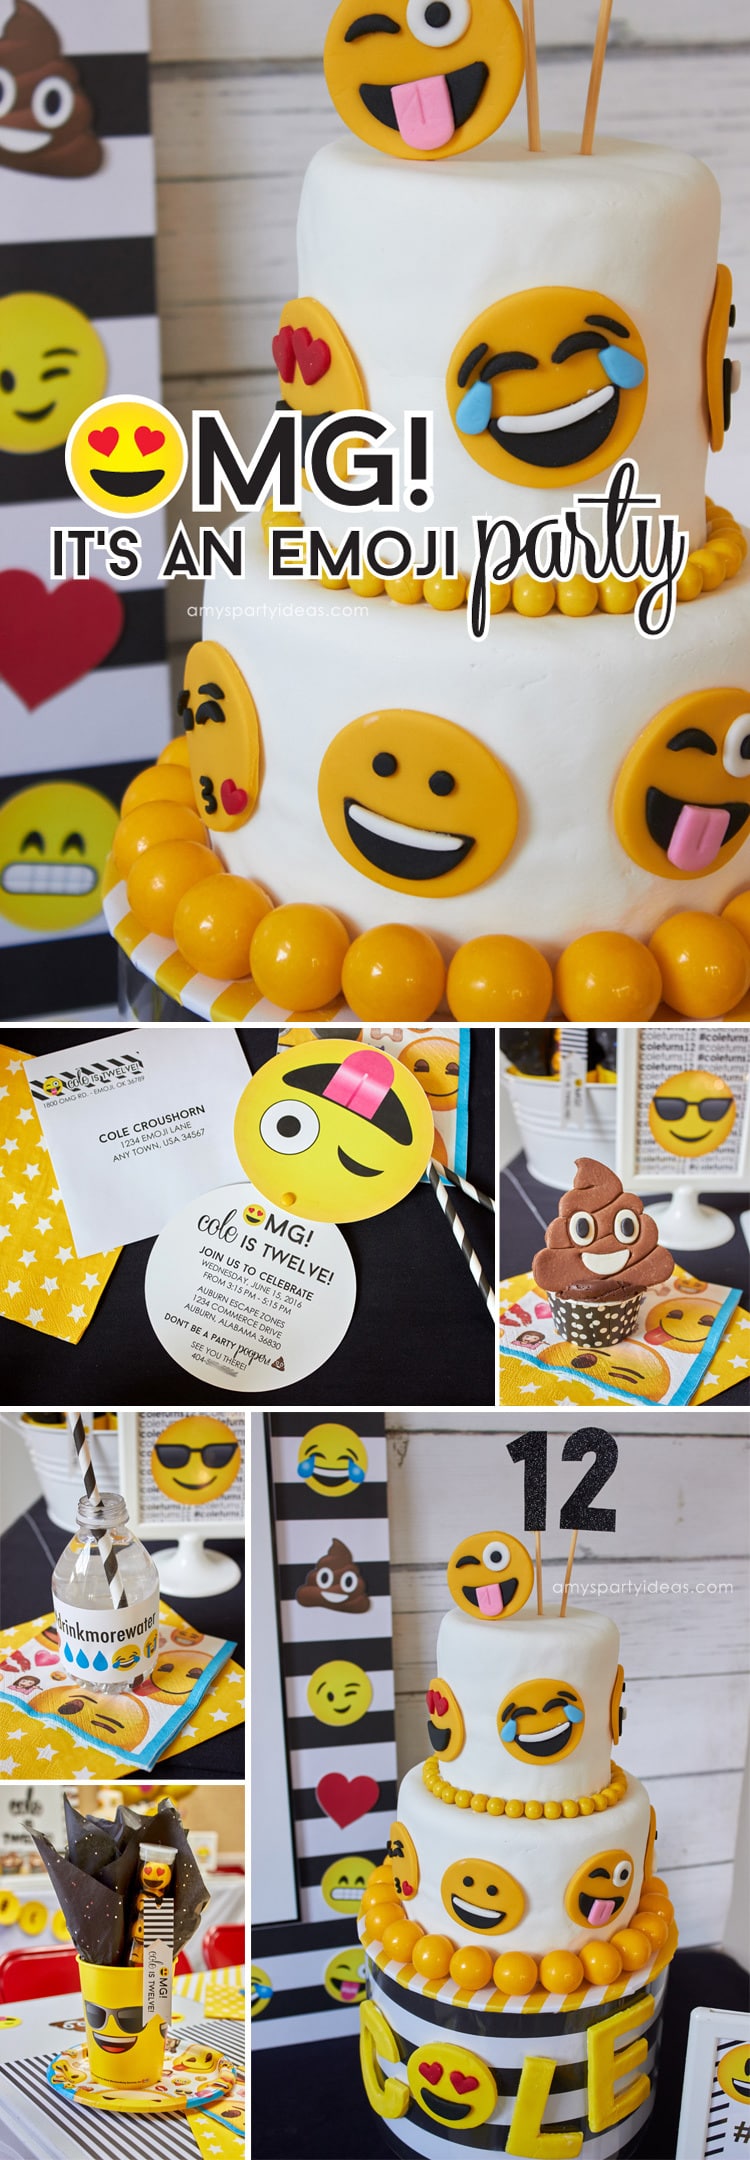
Your invitation should set the theme for your party and I decided to create an emoji face invite! I chose my son’s favorite emoji and used it as the face of the invite. It’s double layered with the party details on the second circle. I attached them together using yellow brads from my local craft store which allowed the circles to “swing” open and reveal the details. Aren’t they cute?
2. Backdrop & Banner
I created a simple backdrop using a posterboard mounted to foam core and then I printed out this custom sign 16×20 (Walgreens is a great option! They offer same day printing & have coupons regularly.) I mounted the 16×20 custom sign to another piece of foam core and mounted it to the posterboard foam core. This double layer makes it look really nice and it’s sturdy enough to prop up against the wall or use in photos.
I love a personalized banner and this one was perfect for our table! I ordered it from Debbie of Wants & Wishes. I loved the simplicity of it and it was so easy to download, print & cut out for our party.
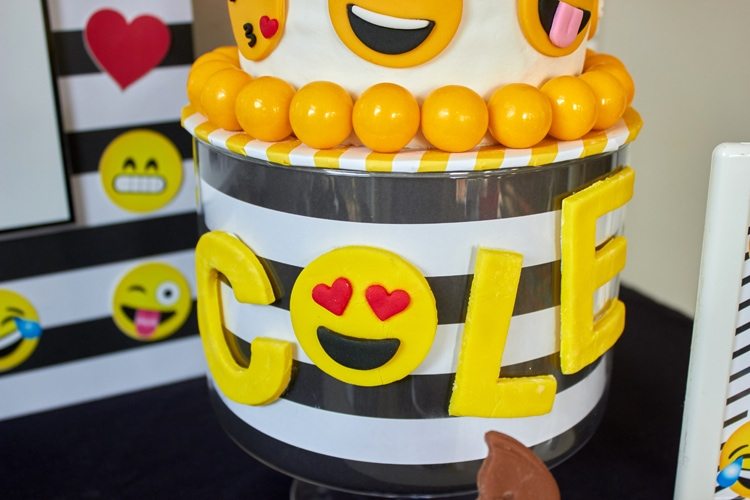
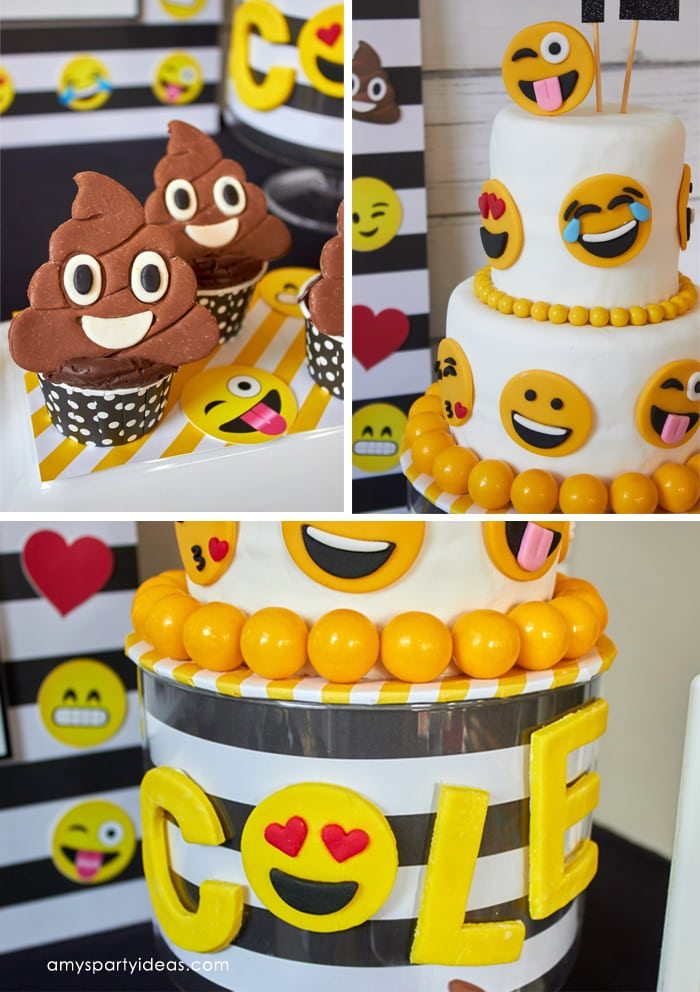
3. Cake & Cupcakes
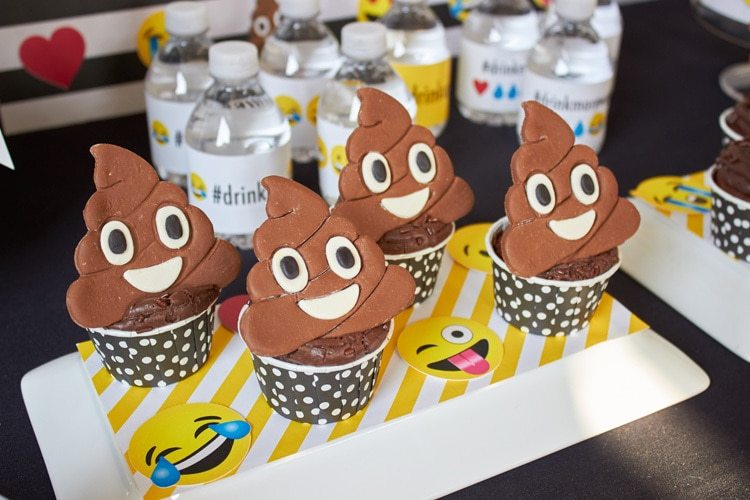
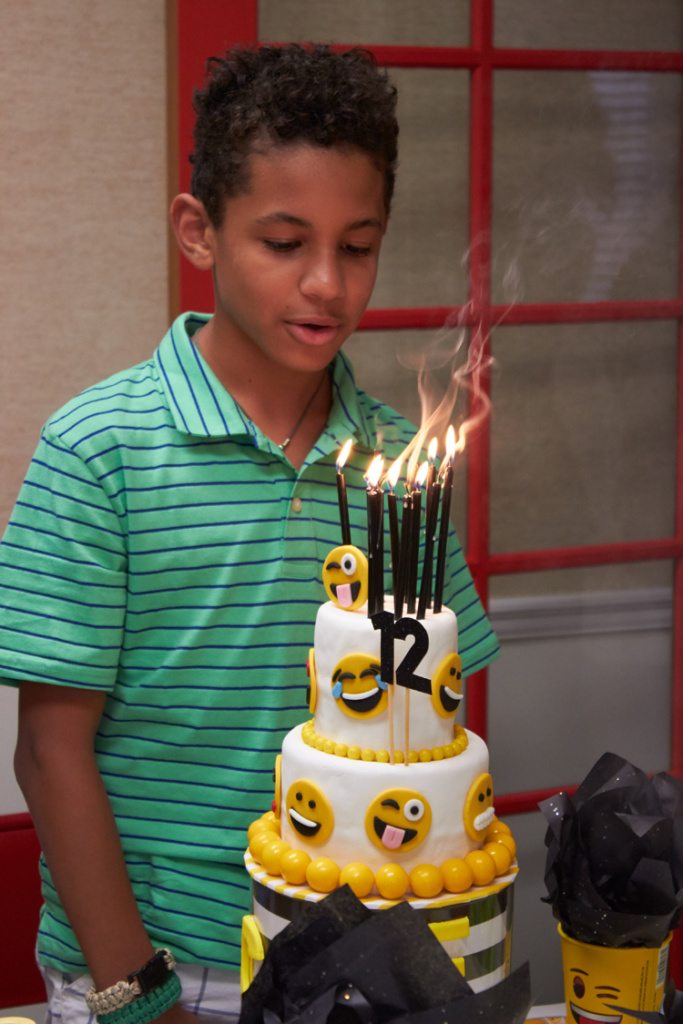
My favorite detail from our party was our cake & cupcakes! I love the look of a custom fondant cake but I just can’t bring myself to pay for one. I had a bit of success when I made a cake for my son’s 8th birthday party. It turned out pretty good and gave me a bit of confidence to try again. I can bake a small cake and do a decent job of covering it with fondant. But when it comes to decorating, I like to buy elements and use them to decorate the cake. For our cake, I ordered fondant emoji cupcake toppers and “glued” them to the fondant using royal icing. With a smaller party, I didn’t need a huge cake so I made two small tiers of cake using these stacked cake pans and I covered a round cake board with scrapbook paper and put it on top of a glass trifle bowl. I wrapped the inside of the glass trifle bowl with black and white scrapbook paper to give it extra decoration. I used custom cookie cutters and cut out his name in yellow fondant. I “glued” the letters to the outside of the glass trifle bowl with royal icing. To finish the edges of the cake layers, I “glued” large yellow gumballs around the bottom of each cake tier. I just love how it turned out!
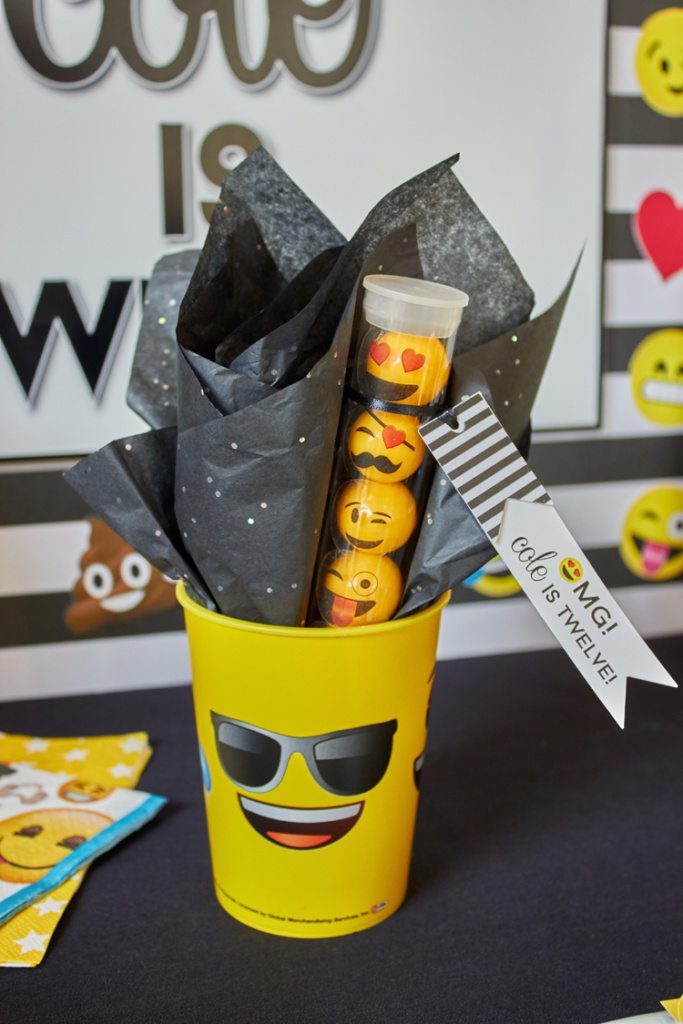
4. Party Favors
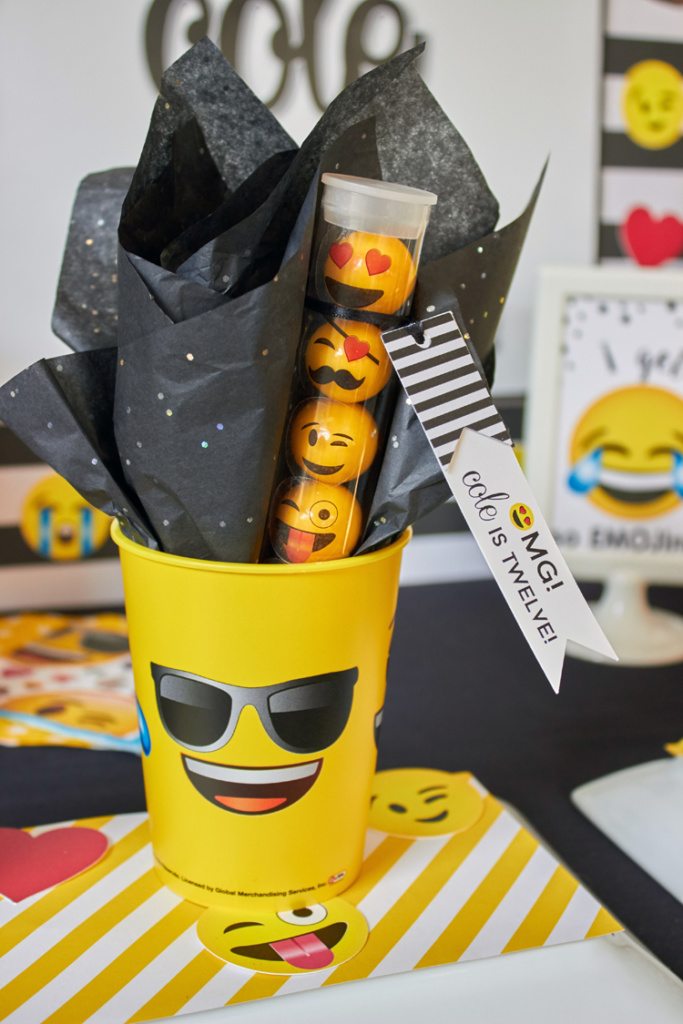
As the kids get older, favors seem more trivial than they once were. So I kept it super simple. What pre-teen doesn’t like candy? I used large yellow gumballs in clear candy tubes and added emoji face stickers to the outside of the tubes to make the gumballs look like emojis. So simple! Or an even easier option is to buy large emoji gumballs…the emojis are already printed on the candy. Or these pre-packaged emoji gumballs come in a cute favor pack of 5 gumballs each. I used what I had on hand and then put one candy tube in an emoji favor cup and added a piece of black tissue paper in each cup and tied a cute favor tag to each tube of gumballs. It was simple and just enough of a favor for the pre-teen crowd.
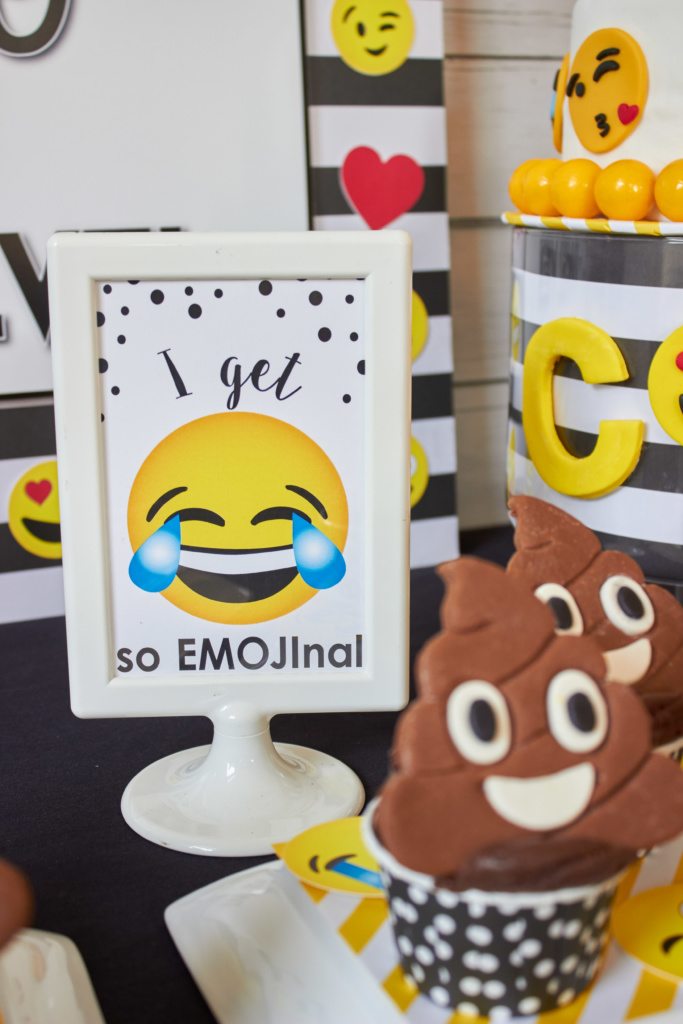
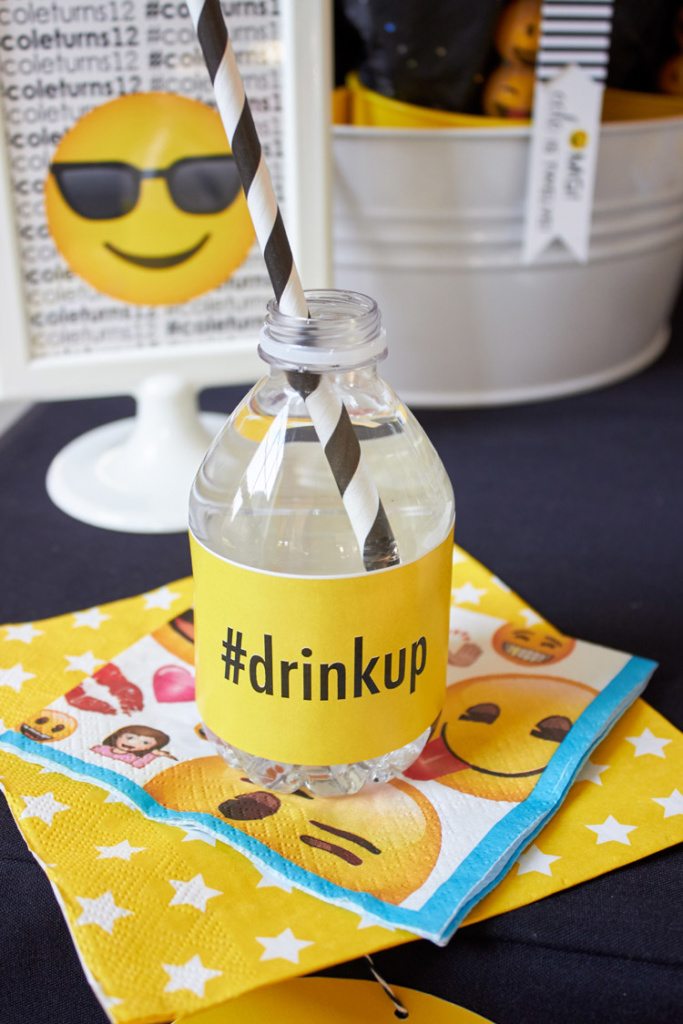
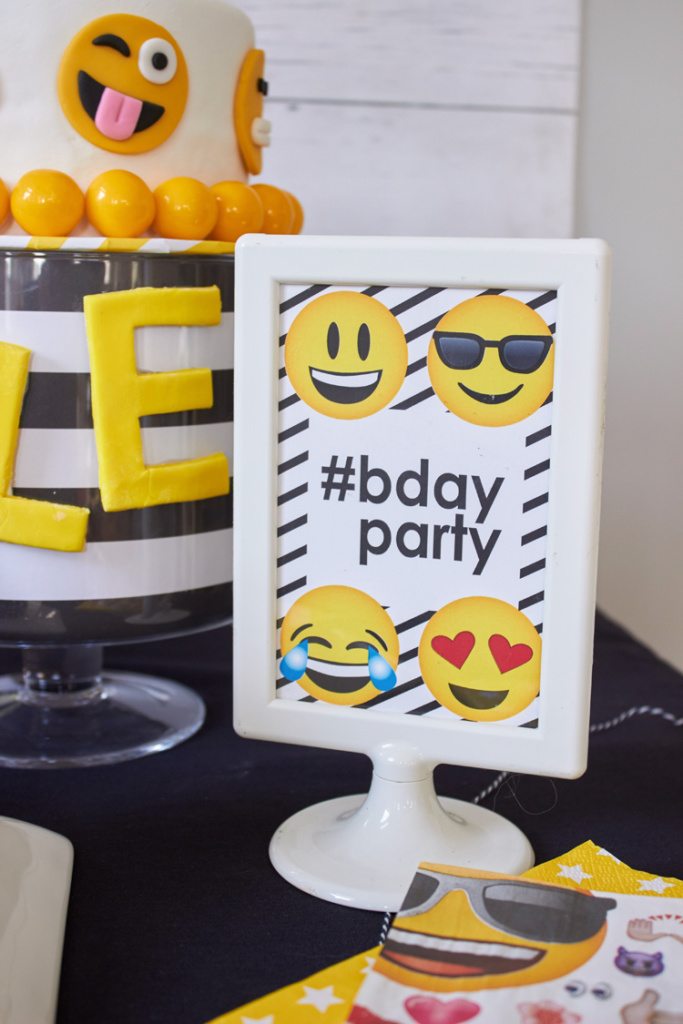
5. Drinks & Signs
When I was looking for inspiration for my party, I came across these cute emoji themed signs. I couldn’t resist getting them! They were perfect for the table and made the kids laugh. And these printable water labels were great too for our water bottles. Since we had our party in the middle of the afternoon, dessert and water to wash it down with was all we needed to celebrate. My tip for when you host a party outside of your home is to keep it simple with a few fun themed items. Water is always a good idea!
I’d love to see how your emoji party turned out! Link to it in the comments and share your ideas with us!
Pin this image for later:
What a creative, fun idea for a themed party! This looks like it turned out really well while not taking months and months of planning. Thanks so much for sharing – it gives a great amount of inspiring ideas!